Best Stitch Markers for Knitting: Ring vs. Locking
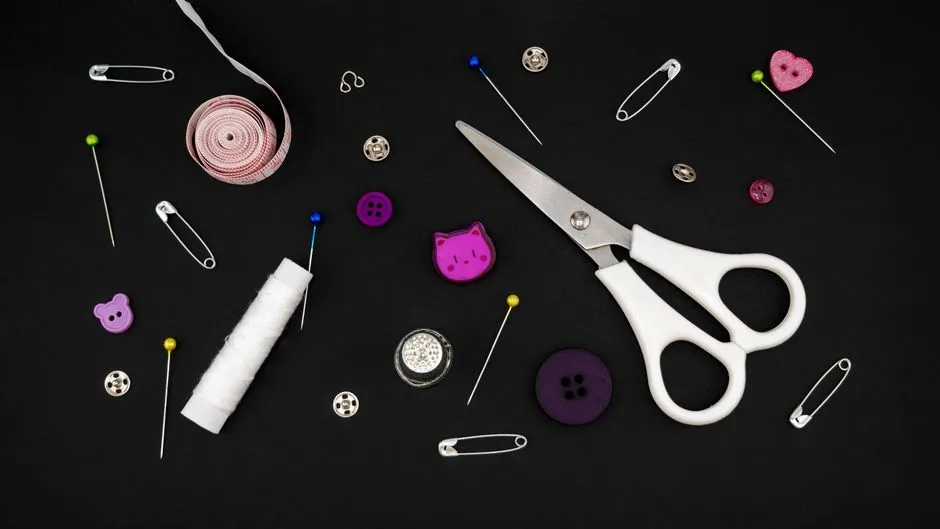
Buy Ring Markers First, Then Add Locking Markers
The best stitch markers for most knitters are thin, smooth closed rings sized just larger than the needles they will sit on, plus a smaller set of locking removable markers. Rings move cleanly between needles and mark repeats or round beginnings; locking markers clip directly into fabric for row counting, repairs, shaping, and crochet-style placement.
You need markers that fit the needle, do not snag the yarn, remain visible against the project, and release easily with one hand.
Our category verdicts:
- Best everyday marker: smooth closed nylon or metal ring.
- Best all-purpose second set: coil-free locking marker with a rounded tip.
- Best for large needles: lightweight flexible ring in a clearly stated diameter.
- Best for lace and fine yarn: very thin closed ring with no visible join.
- Best for row counting and dropped stitches: locking removable marker.
- Best budget kit: two sizes of plain rings plus safety-pin-style markers, stored separately.
Ring vs. Locking vs. Split Markers
| Type | Sits on needle? | Clips into fabric? | Best use | Honest drawback |
|---|---|---|---|---|
| Closed ring | Yes | No | Round beginnings, repeats, shaping points | Must be removed by reaching its needle position |
| Locking marker | Yes | Yes | Repairs, row counting, flexible placement | Bulkier; hinge or tip can catch yarn |
| Split-ring marker | Sometimes | Yes | Fast temporary fabric marking | Can work loose or snag if the spiral edge is rough |
| Charm marker | Yes | Usually no | Visibility and personal style | Weight can distort fine fabric; hardware may catch |
| Scrap-yarn loop | Yes | Can be threaded through fabric | Emergency and ultra-light marking | Easy to knit into the work and slower to move |
How We Judge Stitch Markers
Fit, measured against the needle
A marker must slide freely along the needle shaft without being so large that it dangles into neighboring stitches. Product listings often use terms such as small, medium, and jumbo; those labels are not measurements. Look for the marker's inside diameter and compare it with your largest intended needle.
The ring needs clearance, not acreage. A marker only slightly larger than the needle is less likely to migrate under a stitch or stretch the gap beside it. For interchangeable circulars, remember that it must also pass the join between tip and cable. Our guide to interchangeable needle sets explains why a smooth join matters to everything traveling across it.
Surface and join quality
Run a marker across a fine strand or the inside of a delicate swatch. Mold seams, wire ends, jump rings, hinges, and decorative attachments are the usual snag points. A marker advertised as snag-free still needs inspection.
Closed metal rings should have a smooth continuous surface or a join polished enough that a fingernail cannot catch it. Nylon rings should not have a sharp molding ridge. Locking markers need a rounded working tip and a closure that aligns without leaving an exposed barb.
Visibility without visual clutter
Choose colors that contrast with the yarn. Dark purple markers can vanish in dark purple knitting, no matter how loyal you are to the brand palette. Mixed-color packs are useful when one color marks the beginning of the round and another identifies pattern repeats or shaping.
Avoid using six colors unless their meanings are written down. A marker system should reduce mental load, not establish a tiny unelected parliament on the needle.
Weight
Heavy charms are pleasant on a sturdy worsted-weight project and disruptive on cobweb lace. Weight pulls on the ladder between stitches and swings while you work. For fine yarn or many repeats, choose the lightest marker that remains visible.
One-handed usability
A locking marker should open and close without excessive force, but it should not pop open when the fabric folds inside a project bag. Test whether you can operate it with the fingers that remain free while holding the needles. Very small bulb pins are low-profile but can be fiddly for anyone with limited dexterity.
Durability and replaceability
Markers are small working tools that are easily lost. We favor simple sets whose missing pieces can be replaced without rebuying a coordinated collection. Inspect plastic hinges for whitening or cracks, and discard any metal marker with a bent sharp point or rough coating.
The Best Type for Each Job
Closed rings: the default for needle positions
Use closed rings when the pattern says to place a marker between stitches. The Craft Yarn Council's knitting abbreviations list includes “m” for marker and lists standard instructions such as “pm” and “sm”; in practice, place the ring on the needle at “pm” and move it from left needle to right at “sm.” It is a position marker, not a stitch.
Thin nylon rings are inexpensive, light, and available in useful colors. Smooth metal rings feel more durable and can be exceptionally thin. Either material works; finish quality matters more.
Worth knowing: a closed ring cannot be removed from the middle of a row without knitting to it or transferring stitches. If you accidentally trap one inside a cable crossing, resist the urge to cut metal beside the yarn. Move the stitches safely or use the opening designed into a removable marker.
Locking markers: the useful multitaskers
A locking marker opens like a small safety pin and clips through a stitch, around the needle, or into a specific row. It can:
- Secure a dropped live loop until you can repair it
- Mark the right side of reversible fabric
- Count rows or shaping intervals
- Hold a seaming point
- Mark a crochet stitch or cast-on reference
- Replace a closed marker without moving every intervening stitch
This is why a few belong in every notions pouch. Our dropped-stitch repair guide uses one as the first line of defense when a loop starts running.
Worth knowing: locking markers are bulkier. A thick plastic body can widen the gap between stitches if left on the needle, and a pointed closure can split loosely spun yarn. Choose the smallest comfortable size for the job and clip through the stitch structure without piercing the yarn strand itself.
Split rings: quick but less secure
Split markers have an open spiral or notch, so they can be slipped into fabric without opening a hinge. They are fast for marking a row, checking every tenth increase, or identifying the right side.
Worth knowing: an exposed spiral end can catch fuzzy yarn, and the marker can rotate out of an open stitch while the project moves in a bag. We prefer locking markers for any live loop or reference point whose loss would matter.
Charm markers: choose the hardware, then the charm
Decorative markers can be delightful. They also add jump rings, wire loops, bead edges, and weight—all possible failure points. Inspect the connection before buying and match the set to the fabric.
Use charms sparingly as special markers: one for the beginning of a round, perhaps another for a center point. Too many swinging glass beads add weight and can tangle in the work.
Worth knowing: charms can tangle in floats, lace openings, and neighboring markers. Avoid them for fine, fuzzy, or highly textured projects unless the attachment loop is exceptionally smooth and the charm very light.
Scrap yarn: the free option that genuinely works
Tie a short loop of smooth contrasting waste yarn and place it on the needle. It weighs almost nothing, fits any needle, and cannot scratch a tip. For a temporary marker, it is not a compromise.
Choose a non-fuzzy strand that contrasts clearly and tie a secure loop with short but visible tails. If the loop is huge, it can slide under stitches; if the tails are long, you may knit them accidentally.
Worth knowing: scrap loops are slower to manipulate and easier to mistake for project yarn. They are excellent for a few markers and tedious for a pattern requiring dozens.
Choose the Right Size
Marker size should track needle diameter. A simple buying system is:
- Fine set: sock, lace, and smaller garment needles
- Everyday set: the midrange used for common sweaters, hats, and accessories
- Large set: bulky projects and thick needle joins
Because manufacturers define those words differently, check inside diameter in millimeters. If the listing provides only a maximum needle size, make sure that measurement refers to the actual marker opening and leaves it free to slide.
Test one marker before distributing a whole pack across a row. It should cross the needle shaft and any cable join without effort, but it should not pass over the neighboring stitch. If it wedges at the join, forcing it can separate an interchangeable connection or distort the marker.
Build a Small, Better Marker Kit
Most knitters can cover nearly every pattern with:
- Twenty to forty thin closed rings in the size used most often
- Ten to twenty closed rings in a smaller or larger size
- Ten locking removable markers
- One distinct marker for the beginning of a round
- A tiny container that closes securely
The exact count depends on what you knit. Lace charts and all-over cable repeats consume markers rapidly. Plain scarves need almost none. A sweater knitter benefits from locking markers for increases and seaming, while someone using magic loop or double-pointed needles may need only a round marker and a few shaping references.
Do not buy a 200-piece assortment simply because the unit price is low. If half the pieces are too large, sharp, or invisible against your favorite yarn, the apparent value disappears.
Marker Mistakes That Create Knitting Mistakes
Knitting the marker as though it were a stitch
At “slip marker,” move the marker from left needle to right without working it. If a scrap-yarn loop looks too much like the project, replace it with a contrasting ring.
Letting the marker create a ladder
Do not pull the stitches on both sides dramatically apart to make room. Slide the marker normally and maintain the same tension used elsewhere. A thick marker can create a persistent gap, so downsize if the fabric shows one.
Losing the beginning of the round during a decrease
When a decrease consumes a stitch beside the marker, remove the marker, work the decrease, and replace it in the intended boundary position. Read the pattern carefully: the logical beginning may need to move.
Clipping through yarn instead of around a stitch
A removable marker should pass through the opening of a stitch or around its bar, not spear and divide the strand. Splitting the yarn weakens its structure and can make the marker difficult to remove.
Leaving markers in for washing
Remove markers unless the pattern requires them and the manufacturer explicitly says their material and finish tolerate the care process. Metal can discolor or snag; plastic can deform under heat; charms can damage both fabric and washing equipment. Replace key positions with contrasting waste yarn if they must survive blocking.
Safety and Storage
Stitch markers are small objects. Keep them away from babies, young children, and pets, and never leave an open marker where it can be swallowed or stepped on. Store them in a lidded container rather than loose in a sofa cushion or the bottom of a project bag.
Discard cracked plastic, sharp wire, detached charms, and closures that no longer lock. A damaged marker costs less to replace than a pulled strand in an almost-finished sweater.
What We Would Buy
Start with plain closed rings that fit your most-used needles, in at least two high-contrast colors. Add locking markers with smooth rounded tips for repairs and fabric placement. Choose a few larger rings only when your needle collection requires them, and treat decorative charms as pleasant specialists rather than the backbone of the kit.
The best marker is visible when you need it, invisible to the finished fabric, and easy to move without interrupting your knitting.